使用 Travis CI 部署 Hugo 博客到 Github Pages

原本使用的是 Netlify 去部署博客的,域名解析也是通过 Netlify 的 DNS 服务器,但是发现博客在别人的电脑上打不开…
原本使用的是 Netlify 去部署博客的,域名解析也是通过 Netlify 的 DNS 服务器,但是发现博客在别人的电脑上打不开…发现是域名解析的问题,所以就把博客放到 Github Pages 上了,但是这样就失去了 Netlify 提供的自动构建和部署的能力,需要自己去配置 Travis CI 实现自动部署了。
预先要求
创建博客
使用 Hugo 命令行工具新建自己的博客,将代码推送到自己的 Github 仓库
hugo new site my-blog
...
git push
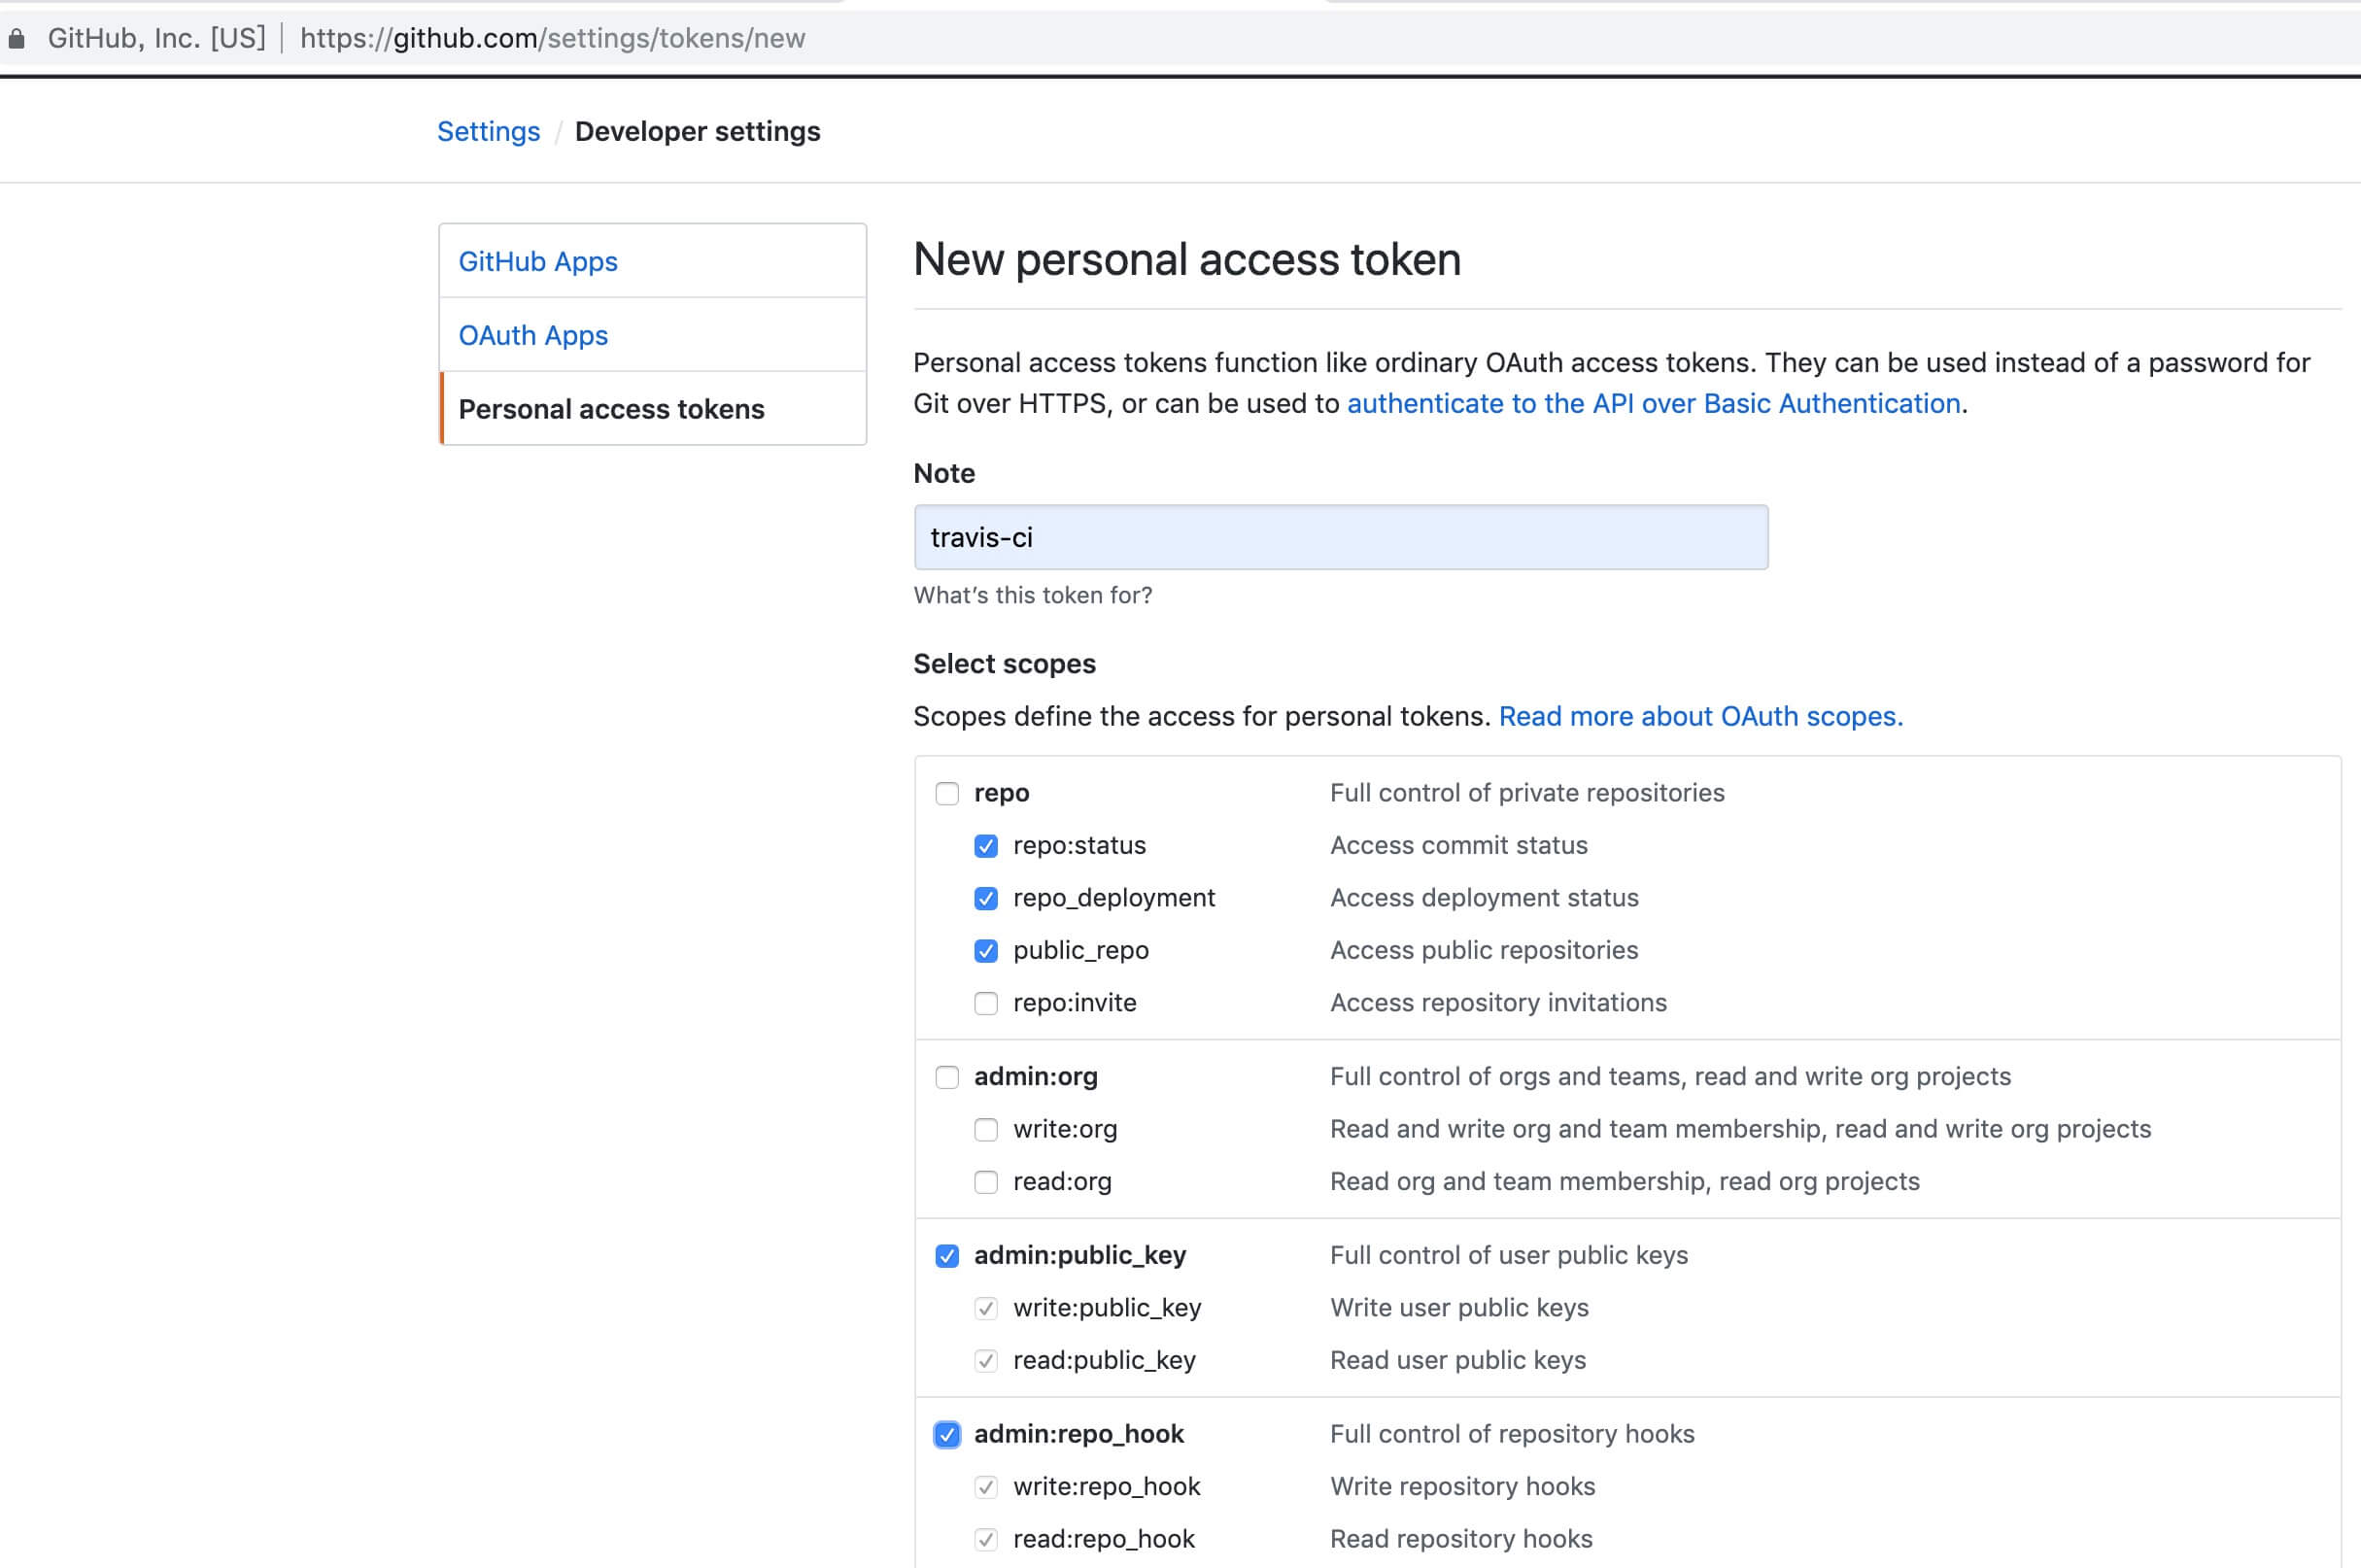
新建一个 Github Personal access token
在 https://github.com/settings/tokens 新建一个 Personal access token 用来发布博客到 Github Pages 时进行验证,复制生成的 token,不要刷新或离开当前页面,否则 token 就看不见了,只能重新生成
登录到 Travis CI 对项目进行关联 https://travis-ci.org/account/repositories
完成后进入设置界面 https://travis-ci.org/your-gihub-user-name/your-gihub-repo/settings
在 Environment Variables 填写 GITHUB_TOKEN 变量,点击 Add 按钮,这样你的环境变量就添加完成了
配置 .travis.yml
因为 Hugo 是用 GO 语言写的,所以要配置 GO 编译环境,在 before_script 里删除了 public 文件夹,如果有自定义域名,将自定义域名输出到构建出来的 CNAME 文件里面去,记得添加 DNS 解析记录到 Gihub 去 参考
language: go

dist: trusty

sudo: false

env:
  - HUGO_VERSION=0.56.0

install: true

before_script:
  - wget https://github.com/gohugoio/hugo/releases/download/v${HUGO_VERSION}/hugo_${HUGO_VERSION}_Linux-64bit.deb
  - sudo dpkg -i hugo_${HUGO_VERSION}_Linux-64bit.deb
  - rm -rf public || exit 0

script:
  - hugo -v --gc --minify
  - echo 'your-custom-domain.com' > public/CNAME

deploy:
  provider: pages
  local-dir: public
  skip-cleanup: true
  github-token: $GITHUB_TOKEN
  keep-history: true
  on:
    branch: master

branches:
  only:
  - master
提交触发构建
最后新建一篇文章,push 到 Github 仓库,触发 Travis 构建就可以了,以后博客进行更新后就可以自动构建发布了。
hugo new posts/my-first-post.md